Portable Wii Endgame
Back at it Again
One of the limitations of creating a portable Wii has always been ergonomics. Creating an organic design that feels good in the hands is an extremely non-trivial task. Wouldn’t it be great if it were possible to capture the feeling of a GameCube controller in a portable Wii? Enter the Ashida.
The Ashida
This design was brilliantly engineered from Wesk on BitBuilt. “How does it look so close to an original GameCube controller?”, you might ask. Wesk used a 3D Scanner, which uses reflected light to reconstruct a 3D model of a real-world object. Unfortunately, with such a complex shape, the results aren’t perfect. Areas of the controller where it’s difficult for light to reflect, such as small pockets, will have deformities in the model. Wesk invested a lot of time remeshing and repairing the model to deal with this. After all was said and done, he cut the model in half and added the design for a portable Wii in between the two halves of the shells; a true game-changer for Wii portable design of the future. Check out his worklog here.
After his initial success, he graciously open-sourced the case design and collaborated with 4LayerTech to create a kit so that anyone can build their own Ashida. After seeing this, I knew I had to build one for myself. It is truly a no-compromises Wii portable.
Building it Myself
I purchased the needed PCBs from 4LayerTech including the RVL-PMS-2 (power management), U-AMP (audio), GC+ (controller), as well as the Ashida carrier board kit and the associated components for it. I also purchased a brand new Nintendo GameCube controller to harvest the joysticks, buttons, and other parts from. The build uses two 21700 cells for a total of a 10Ah capacity. In total, the parts costed me around $250.
The Case
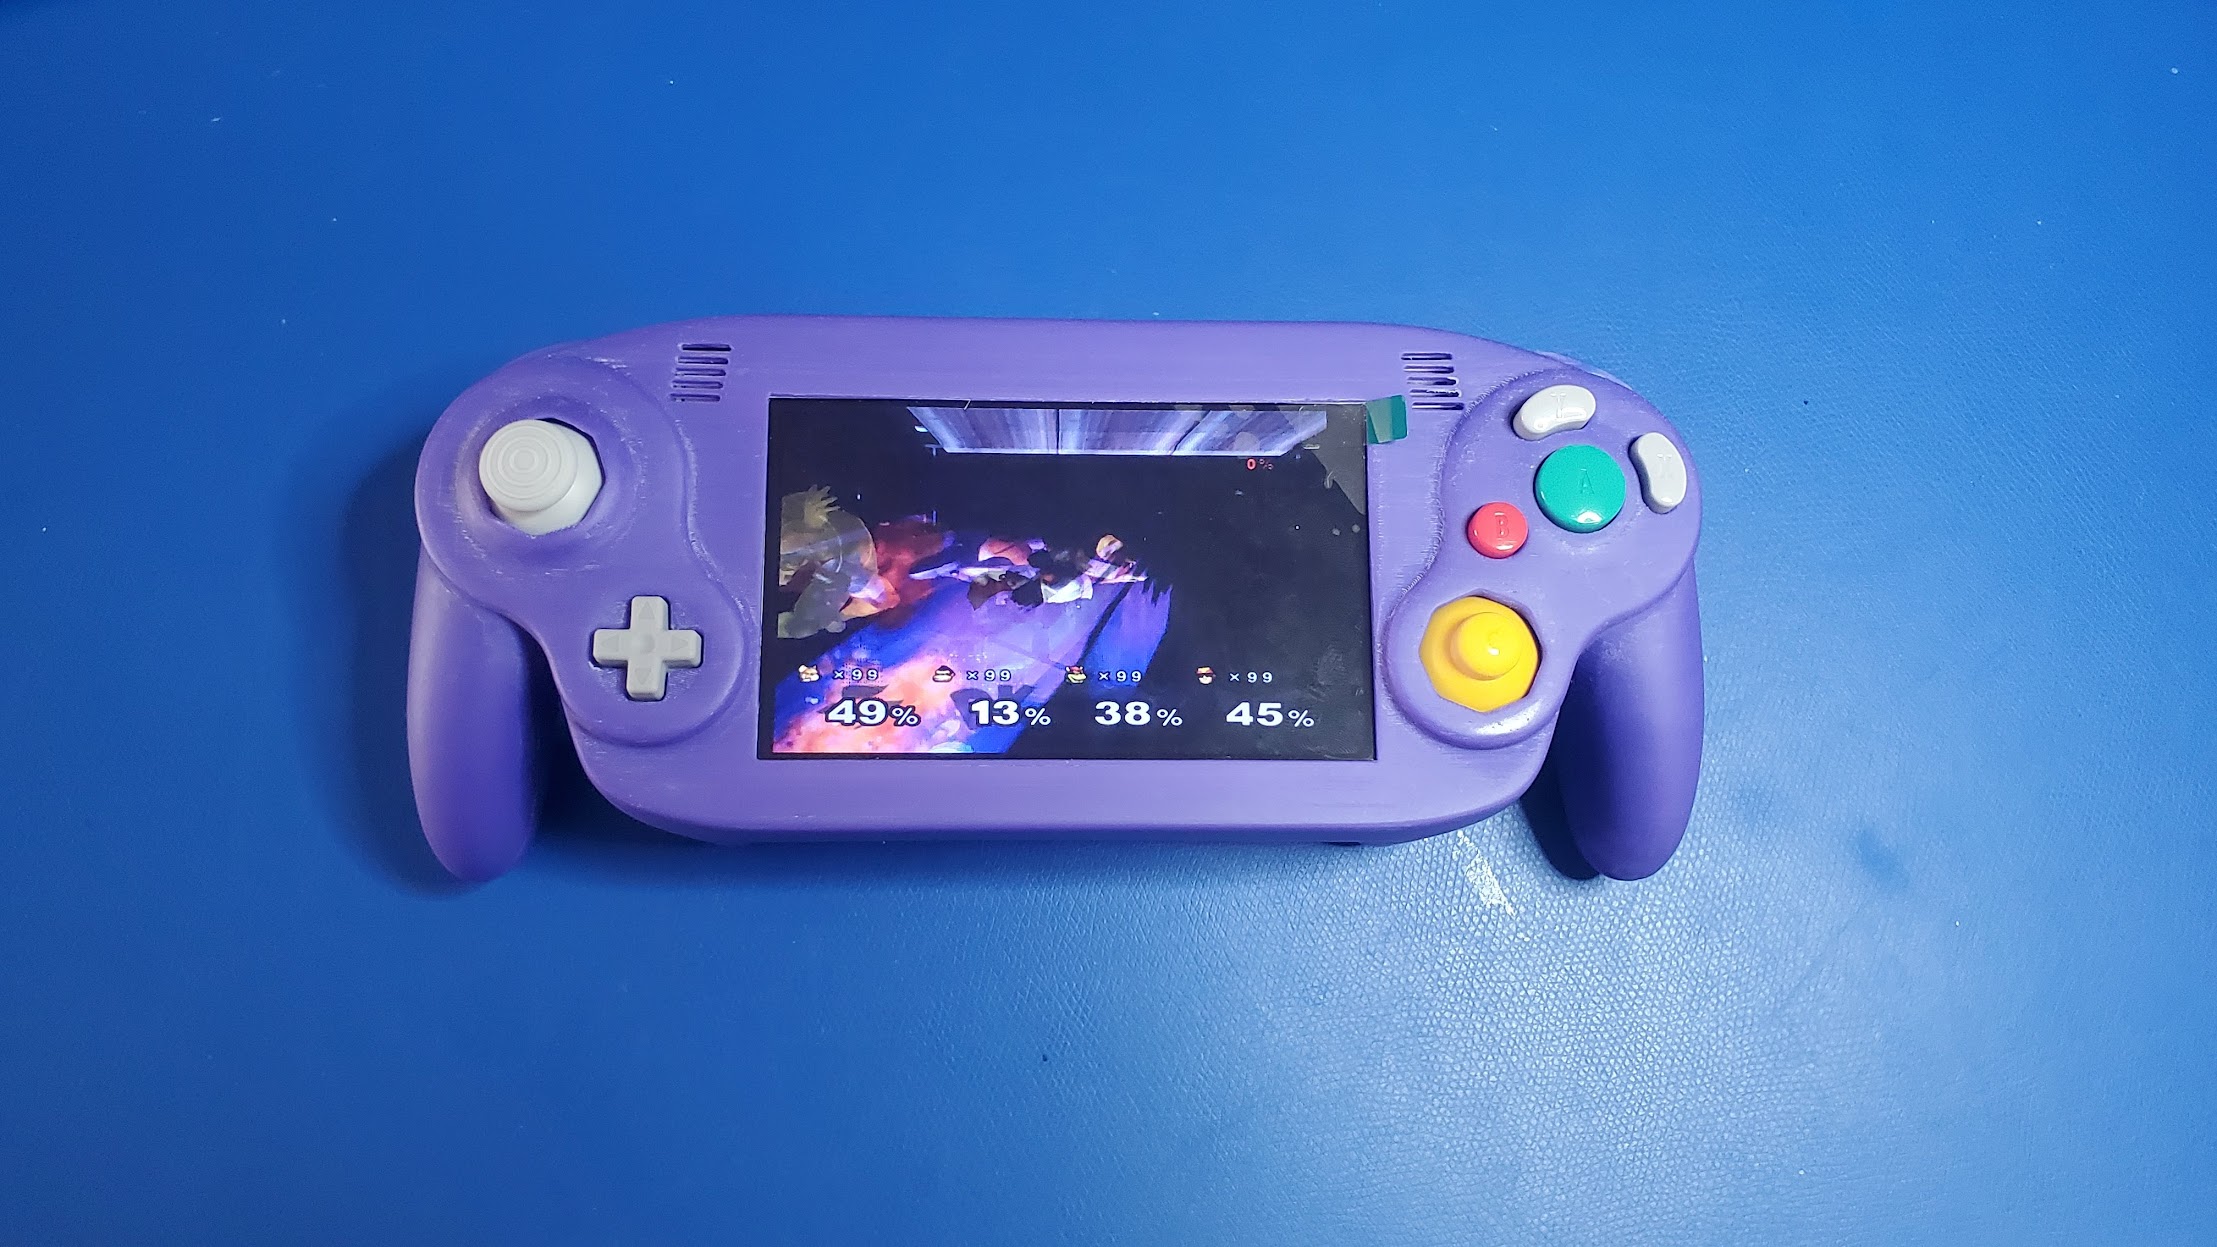
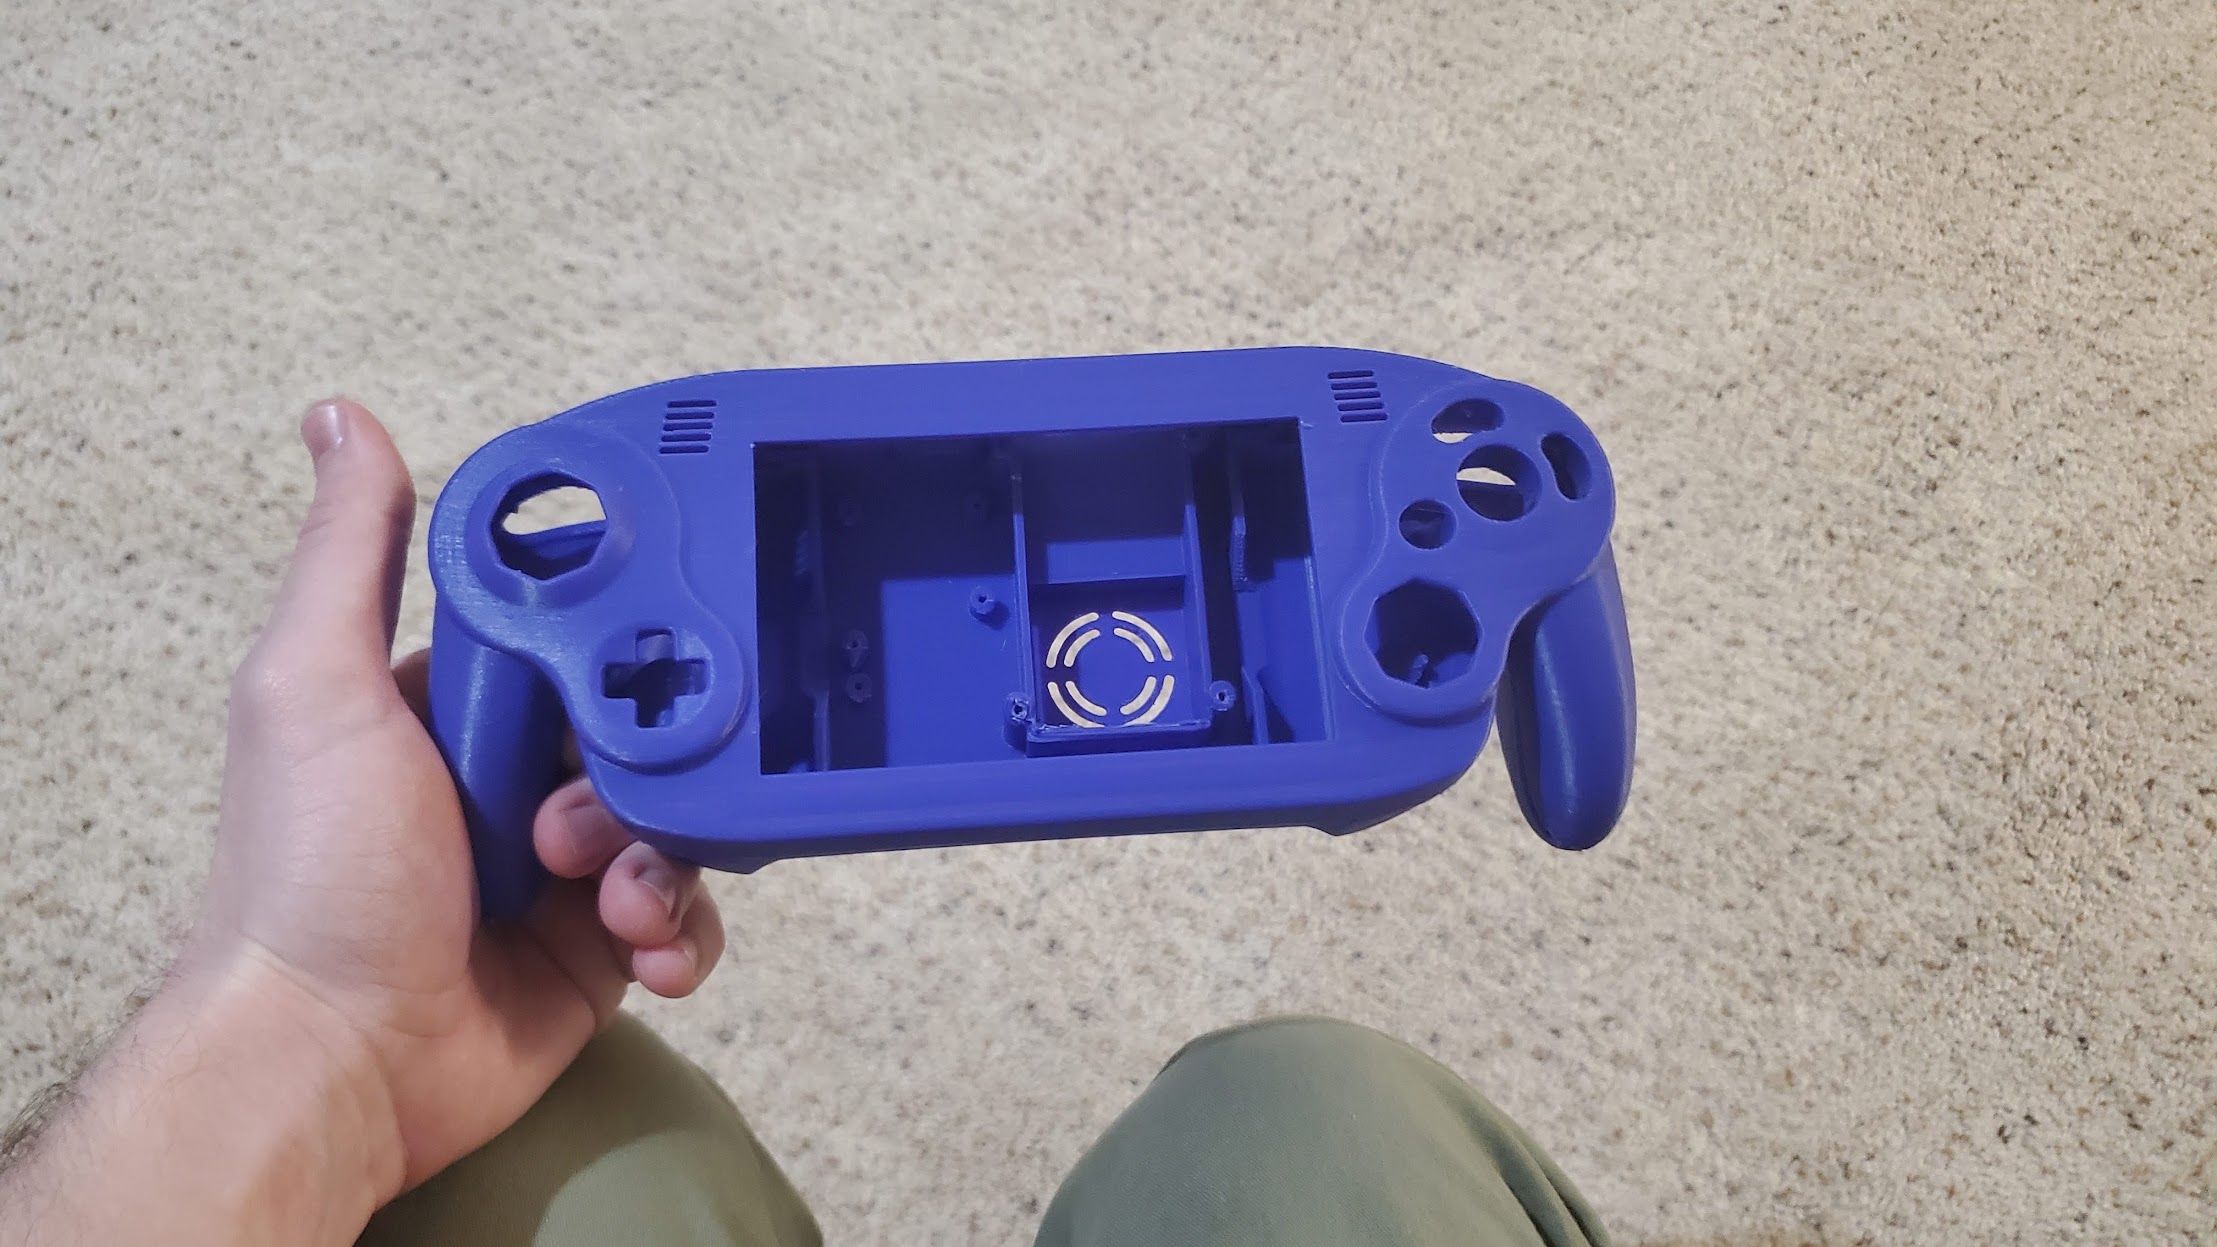
A popular option for printing cases these days is having them professionally printed by services such as JLCPCB or PCBWay. These services can provide extremely high quality prints at extremely low prices. Despite this, I wanted to try printing the case myself. I stumbled across Fusion Filament’s Electron Indigo filament and thought it would be cool to print in this filament to try to get somewhat close to Nintendo’s signature indigo color without having to paint the case. My Prusa MK3S could just barely, and I mean barely, fit the Ashida print on its print bed. The print was oriented at around 45 degrees to reduce layer lines on the front of the case. Each half of the case took around 30 hours to print and used a total of around half a kilogram of filament.
As you can see, there is a lot of support material. I spent at least two days post-processing the case. This involved removal of support material, and sanding the case so that it felt smooth in the hands. I used a sanding disc attachment for my dremel to make the process a bit easier early on, then eventually manually wet sanded at higher grits up to 2000 grit. In hindsight, it probably would have been fine not sanding it at all, but it did help the hand grips feel a lot smoother. I ran into a lot of problems with tolerances around the Z buttons. I ended up spending a lot of time sanding those areas, and as well, needed to trim the physical button down to get it to fit right. I also had to remove the OEM bracket from the shoulder buttons or they would get stuck, due to tolerances. Note to self: make sure everything fits perfectly before putting in all the electronics! If I were to do it again, I would probably just order a resin printed shell from one of the aforementioned services.
 The finished case
Electronics
At this point in my portablizing career, I have trimmed many a Wii. Wiring everything up was just going through the motions again. 4LayerTech’s product page for the Ashida PCBs had some pretty nice wiring diagrams of how to connect everything together. A nice thing about the Ashida design is that it uses battery terminals that friction fit into the case instead of requiring soldering directly to the cells. This also makes it easy to swap out cells, or just remove them if you need to cut power to the system to repair something. It also has a channel underneath the heatsink to route wires through, which was really handy for organizing the wiring and getting it to the top half of the case. I invested a lot of time to make the wiring for this build neat. All of the custom PCBs were a great assist to this as well.
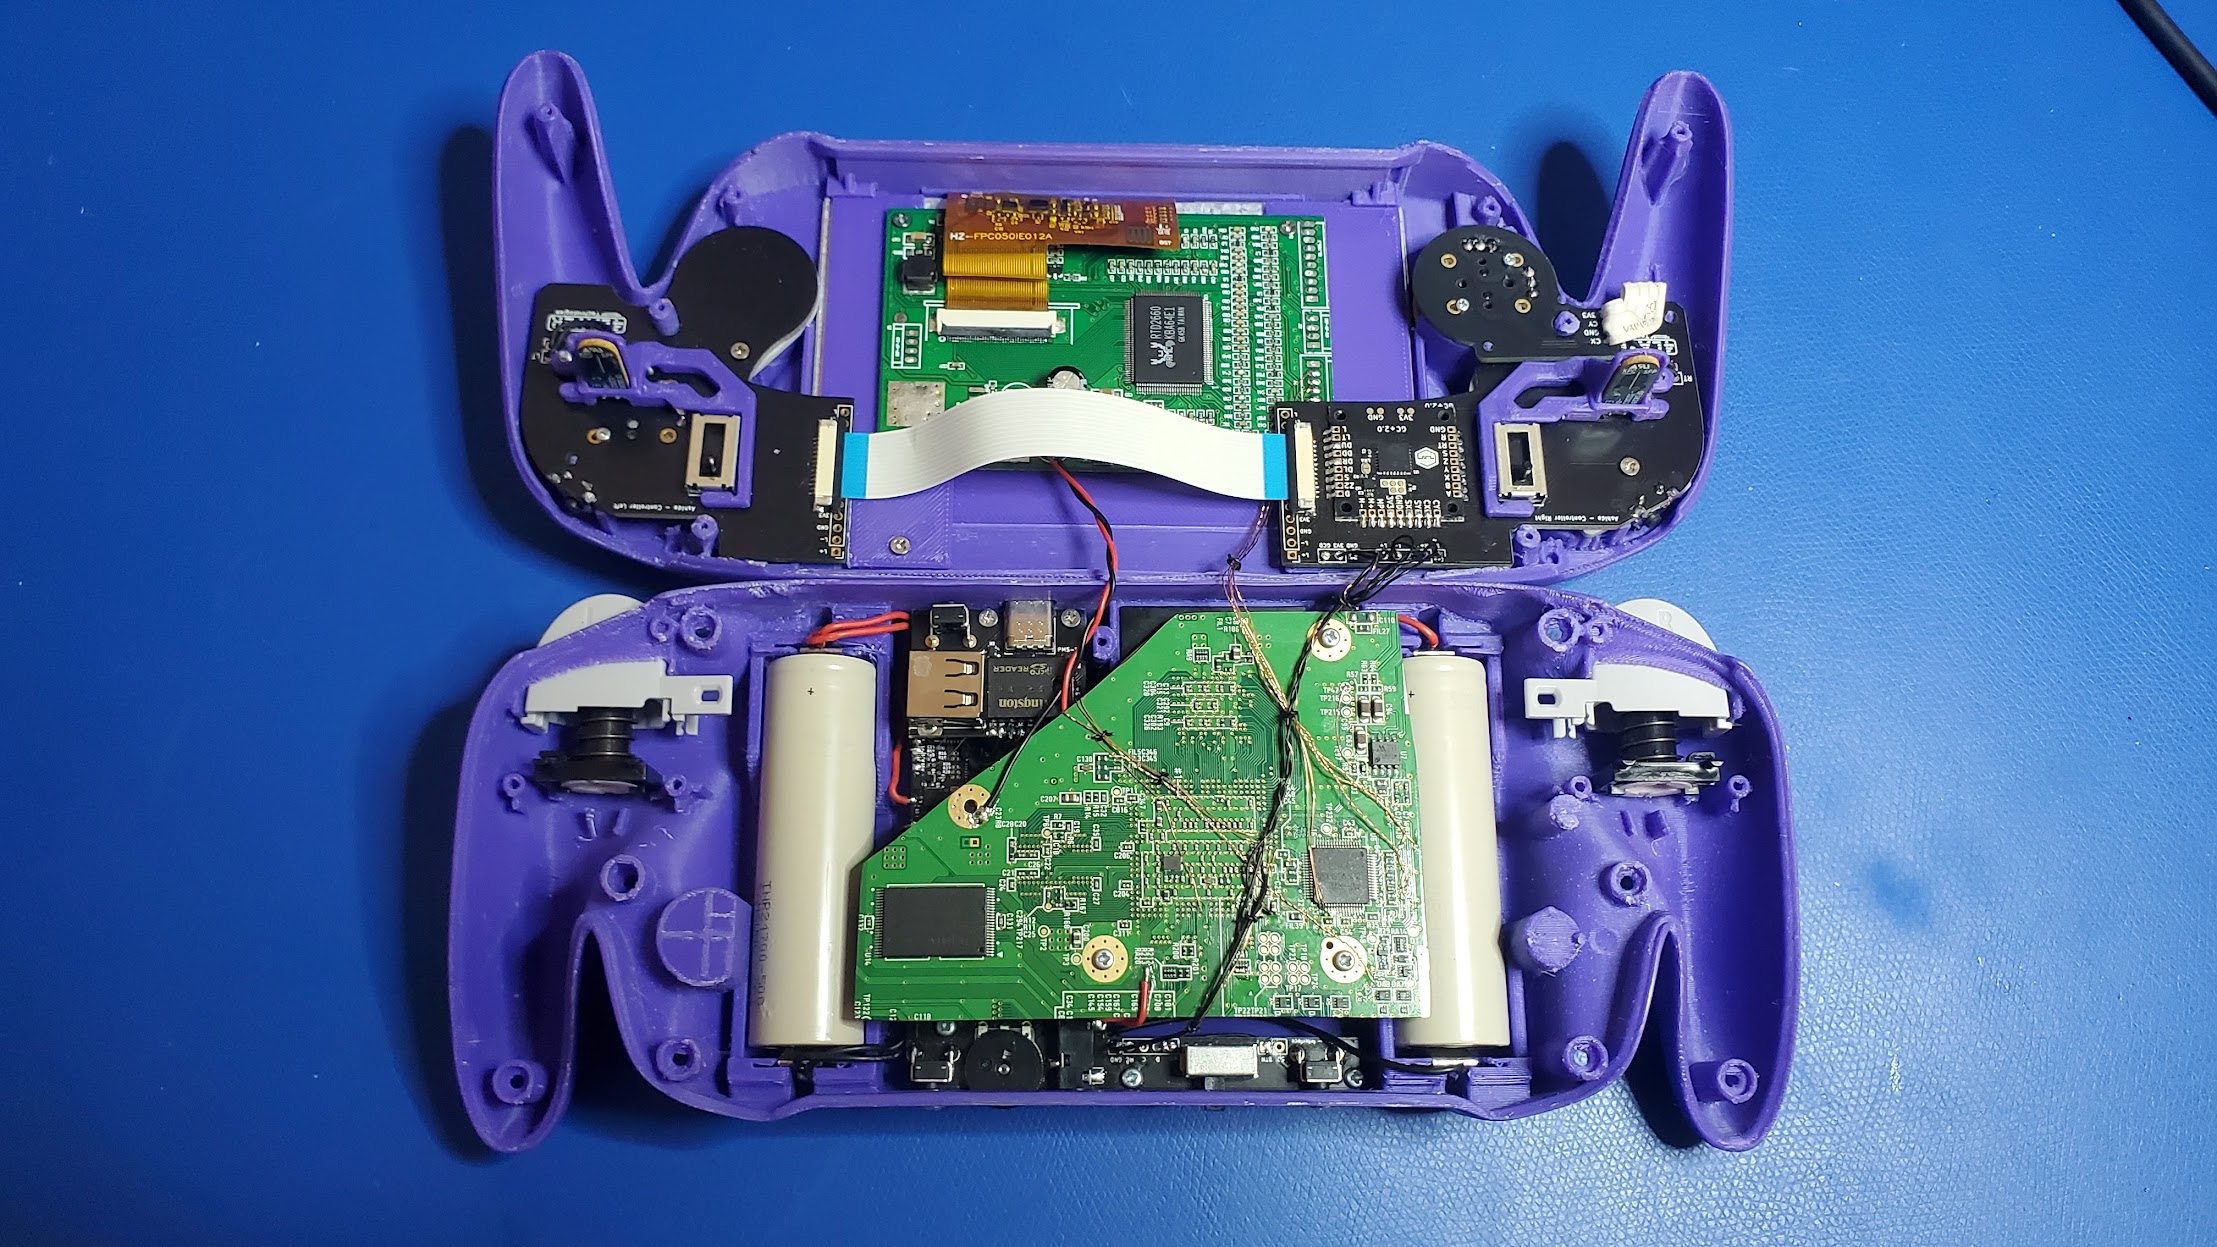 The final internals
The electronics themselves have some interesting features too. A USB-C port can be used to charge the system using USB Power Delivery. That same port can be used to load games onto the internal flash drive when the system is powered off. There is an RGB LED battery life indicator, and PWM fan control based on the system temperature. Firmware for the electronics can be updated via the custom homebrew loader RVLoader. A potentiometer is used to adjust the system volume (which I prefer over push buttons), and headphones are supported as well. The audio itself is high quality digital audio using the Wii’s I2S interface. The display uses the Wii’s native VGA support (which is normally disabled in software, but can be enabled via RVLoader plus some extra wiring to the HSYNC and VSYNC pins that are not connected on the Wii PCB), which looks fantastic on the IPS 5” screen. The colors are vibrant and the viewing angles are great. The batteries last for a solid 6 or so hours of gameplay.
Retrospective
This build is by far my personal favorite. I’ve been playing through Sonic Adventure 2: Battle, Luigi’s Mansion, and Paper Mario: The Thousand Year Door on this portable. I’m extremely proud of how far the console portablizing community has come. Every time it seems like we’re in the endgame, something new blows everyone away. This will likely be the last portable console I build for awhile. My future plans are to contribute elsewhere in the retro-gaming community.
See the full worklog here.